However, you may decide that you do not want Powerpoint to perform this image compression, and that you would prefer for the program to use the original, uncompressed image files in your slides. Fortunately this is something that you can turn on or off in Powerpoint 2013 by using the steps outlined below.
Disable Image Compression in Powerpoint 2013
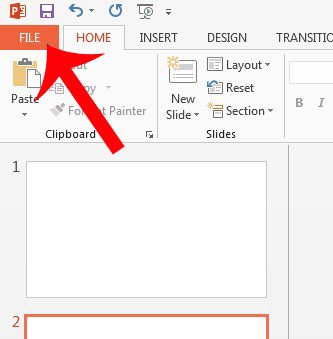
Note that this will apply to all presentations that you create in Powerpoint 2013, and that the file sizes of your Powerpoint presentations may increase dramatically. If you email a lot of Powerpoint files, then this may prevent you from doing so, as many email providers can struggle with attachments that are over 5 MB in size. Step 1: Open Powerpoint 2013. Step 2: Click the File tab at the top-left corner of the window.
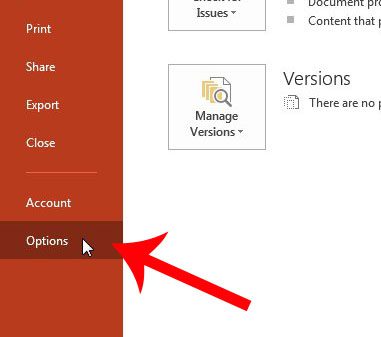
Step 3: Click Options at the bottom of the column on the left side of the window.
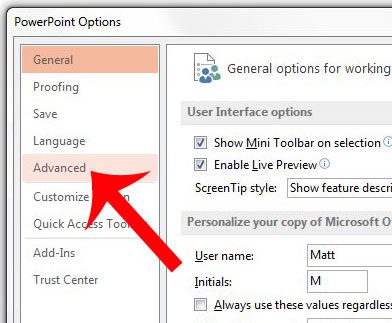
Step 4: Click Advanced in the column at the left side of the Powerpoint Options window.
Step 5: Check the box to the left of Do not compress images in file.
Step 6: Click the OK button at the bottom of the window to apply your changes. Does your Powerpoint presentation need a video, and you aren’t sure how to add one? Read here to learn how to embed a YouTube video into a presentation slide. After receiving his Bachelor’s and Master’s degrees in Computer Science he spent several years working in IT management for small businesses. However, he now works full time writing content online and creating websites. His main writing topics include iPhones, Microsoft Office, Google Apps, Android, and Photoshop, but he has also written about many other tech topics as well. Read his full bio here.
You may opt out at any time. Read our Privacy Policy