Luckily Outlook has a tool that allows you to import and export all kinds of data. Our tutorial below will show you how to export Outlook emails directly to a flash drive.
How to Back Up Outlook Data to a Thumbnail Drive
Our guide continues below with additional on how to export emails to a flash drive in Outlook, including pictures of these steps. If you have just purchased a new computer, or if you need to look at your emails on a different computer, then you probably have been wondering how to export your emails from Outlook 2013. Fortunately, they include an import and export tool that makes this a simple process, even if you want to export those emails to a USB flash drive. This is an ideal solution if you want to create a backup of some important emails, or if you need to move them to a different location.
How to Copy Your Outlook 2013 Emails to a Flash Drive (Guide with Pictures)
We are going to be exporting the inbox to the flash drive in the tutorial below, but you can do this for any folder in Outlook. Just select the appropriate folder where we select the inbox below. We are also going to be exporting a .pst file, which is the native file format for Outlook. However, you can also choose to export your emails as a .csv file if you want to look at the emails in a program other than Outlook. If you use Google Calendar and want to save your calendar data to your flash drive, then read this how to export Google Calendar to Excel guide.
Step 1: Insert your flash drive into a USB port on your computer.
Step 2: Launch Outlook 2013.
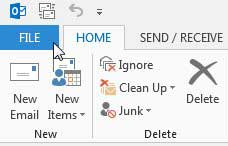
Step 3: Click the File tab at the top-left corner of the window.
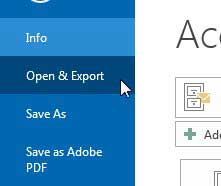
Step 4: Select the Open & Export option in the column at the left side of the window.
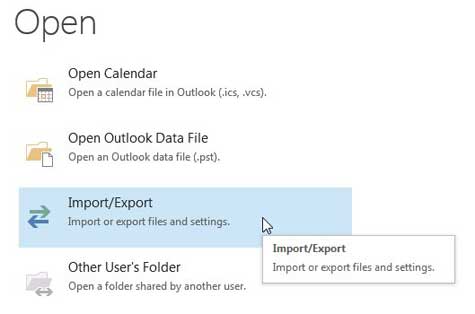
Step 5: Select the Import/Export option.
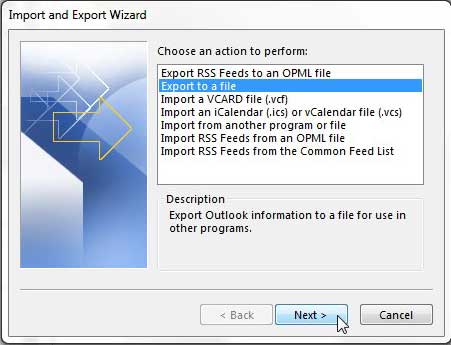
Step 6: Select the Export to a file option, then click Next.
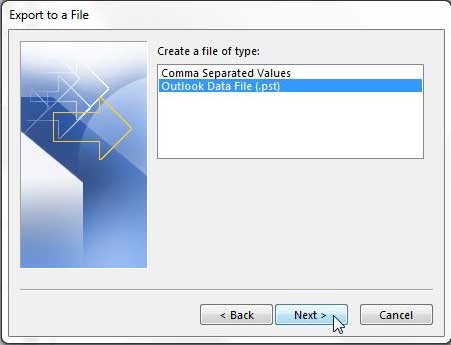
Step 7: Select the Outlook data file (.pst) option, then click Next.
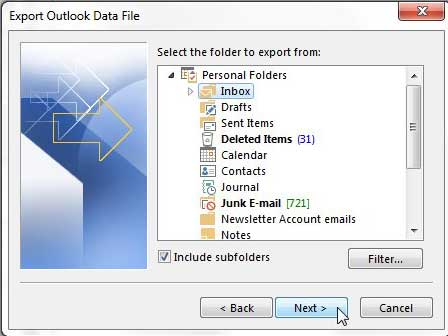
Step 8: Select the folder you want to export, check the box to the left of Include subfolders, then click the Next button.
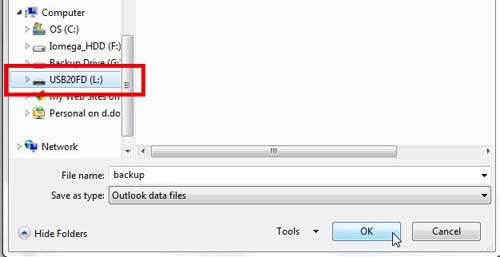
Step 9: Click the Browse button.
Step 10: Select your flash drive from the column at the left side of the window, then click the OK button.
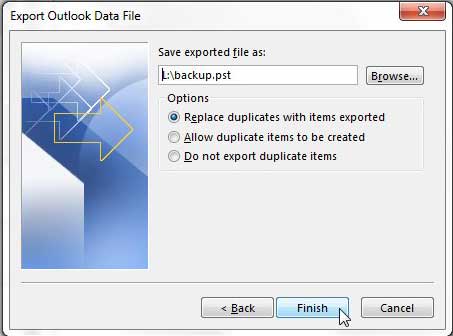
Step 11: Click the Finish button.
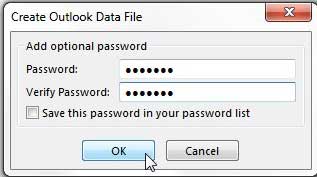
Step 12: Enter a password if you wish, then click the OK button.
Now that you know how to export Outlook data to a flash drive you will be able to use this technique any time you want to create a copy of data from your Outlook file. If you feel like Outlook 2013 isn’t downloading your emails often enough, learn how to change the Outlook 2013 send and receive frequency. After receiving his Bachelor’s and Master’s degrees in Computer Science he spent several years working in IT management for small businesses. However, he now works full time writing content online and creating websites. His main writing topics include iPhones, Microsoft Office, Google Apps, Android, and Photoshop, but he has also written about many other tech topics as well. Read his full bio here.
You may opt out at any time. Read our Privacy Policy