There are a few ways to do this. You can import an entire Excel spreadsheet with the ability to view a preview of your data. Alternatively, you can add an Excel file to OneNote as a file attachment to open separately. Here’s how to do both in OneNote.
Importing a New Excel Spreadsheet in OneNote
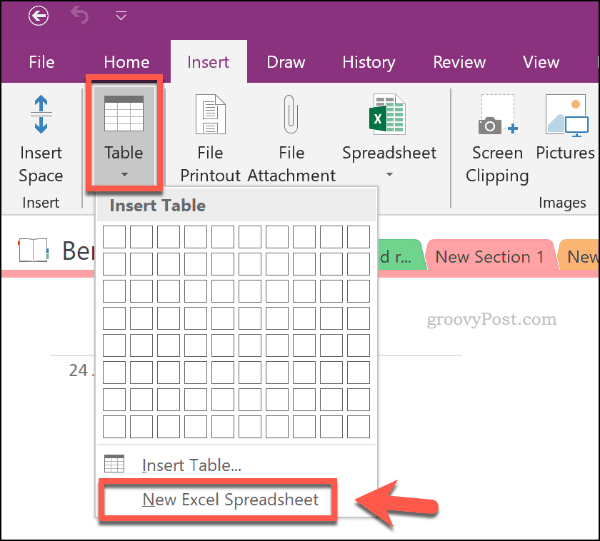
OneNote notebooks are flexible, with the ability to add text, images, and more. One useful feature, however, is the ability to insert entire Excel spreadsheets into your OneNote notebook. If you want to do some financial planning, for instance, inserting a spreadsheet into OneNote would allow you to take advantage of Excel’s extensive financial functions and formatting features. However, the limitation of this feature is that you can only view your Excel data in OneNote. You’ll have to edit the data in Excel first. To import your Excel spreadsheet, you’ll need OneNote installed on your Windows 10 PC. Open the OneNote app. Start with your OneNote notebook. Make sure it is open. To insert a blank Excel spreadsheet, click Insert > Table > New Excel Spreadsheet or Insert > Spreadsheet > New Excel Spreadsheet.
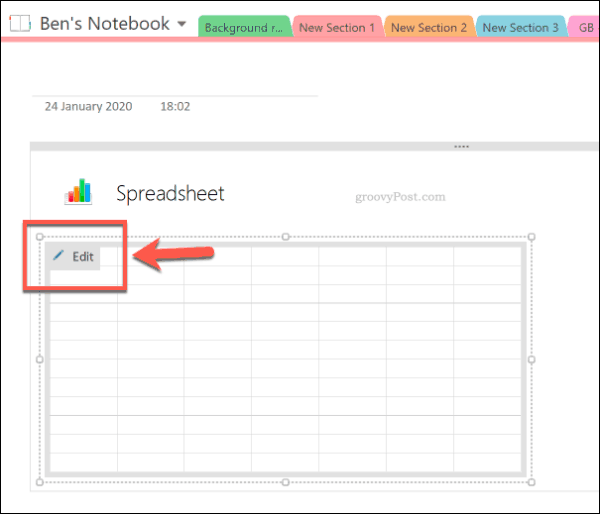
To begin editing your new Excel spreadsheet in OneNote, select the spreadsheet object and click the Edit button.
This will open your spreadsheet in a new Excel window. You can begin editing and creating your new spreadsheet from here. When you edit your Excel spreadsheet, the data preview in OneNote will update. To update this information manually, right-click the spreadsheet object in OneNote, then click Refresh.
You’ll need to save your Excel spreadsheet as a new file (File > Save As in Excel) once you’ve finished editing it. However, your Excel information will remain in OneNote, allowing you to continue to view and access it.
Importing an Existing Excel Spreadsheet in OneNote
Rather than creating a new Excel spreadsheet, it’s entirely possible to insert an existing Excel spreadsheet into your OneNote notebooks. To do this, open your OneNote notebook, selecting the note to insert your existing spreadsheet. From there, click Insert > Spreadsheet > Existing Excel Spreadsheet.
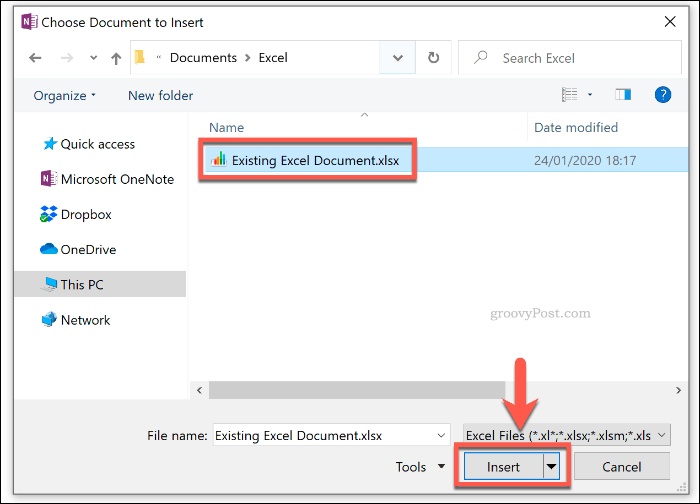
In the Choose Document to Insert window, locate the Excel spreadsheet to insert. Select it, then press the Insert button.
In the Insert File window, click the Insert Spreadsheet option to insert your Excel spreadsheet. This will appear as a spreadsheet object, where your spreadsheet data will be visible as a preview. Press the Edit button to open your existing spreadsheet in Excel and make further changes.
Adding an Excel File Attachment
Rather than importing an Excel spreadsheet as an object, you can save it to your OneNote notebook as a file attachment with the Excel data visible. This allows you quick access to open your Excel spreadsheet without revealing the data underneath. To do this, open your OneNote notebook and click Insert > File Attachment.
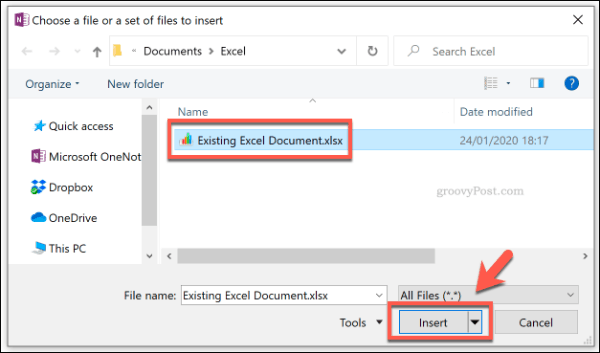
In the Choose a file window, locate your Excel spreadsheet. Select it, then press the Insert button to confirm your selection.
In the Insert File window that appears, click Attach File.
Once pressed, your Excel file will appear as a much smaller file attachment in your OneNote notebook. You won’t be able to view any data, but double-clicking the attachment object will open the file in a new Excel window. Click OK to accept the attachment warning that appears when you attempt to do this.
Using Excel Functions in OneNote
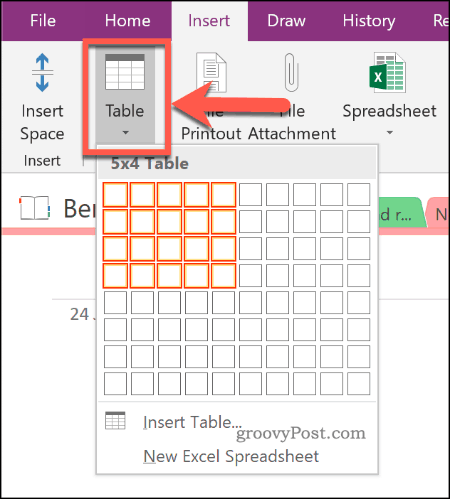
Unfortunately, OneNote doesn’t support the use of individual Excel functions. However, it is possible to use some Excel-style features directly, rather than simply viewing a preview of your Excel data. The easiest way to do this is by using the Gem for OneNote add-in. A license for Gem costs $33, but you can try it out for 30 days for free. Open your OneNote notebook and, on a new note, create a table by clicking Insert > Table and selecting the appropriate size with your mouse.
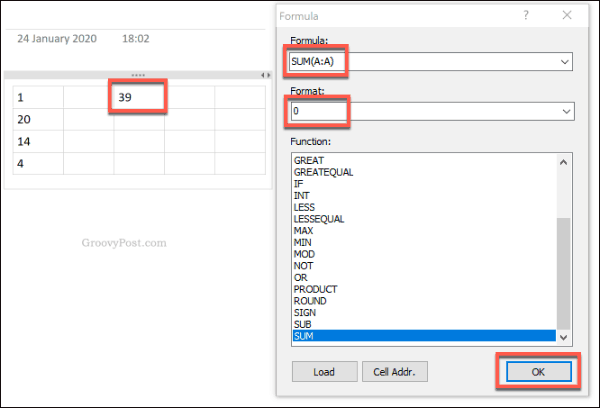
Select a cell in your table once it’s created. Each table cell has a cell reference, similar to Excel. For example, the first cell is A1, the cell next to it is B1, etc. With the assumption that Gem for OneNote is installed on your PC, click the Gem tab in the OneNote ribbon bar, under the Table Tools section. From here, click the Formula button.
In the Formula window, select your formula from the Function list. This will insert this into the Formula box. Edit this to create your formula. For instance, to create a SUM formula that calculates the sum of the cells in the first column of your table, type SUM(A:A), then type the number 0 in the Format box. Press OK to insert your formula.
The result of your calculation, using your chosen formula, will appear in the cell you selected.
Using Excel Effectively in Microsoft OneNote
Planning your financial future can be made entirely possible in Microsoft OneNote, thanks to Excel integration. This is just one of the best Microsoft OneNote add-ins and tools you can use to make the most of this fantastic (and free) note-taking app. If you’re an Excel beginner and want to learn more, here are some Excel tips that every user should know.


![]()
