Pictures might be worth a thousand words, but sometimes people need help figuring out what is important about one of those pictures. If you spend a lot of time creating images or editing screenshots that are intended to show someone how to do something, then you have certainly encountered a situation where you needed to highlight an element in a picture. Since we create a lot of screenshots and tutorials on this site, this is a problem that we face on a regular basis. Some problems can be solved with a box or some highlighting, but an arrow is still one of the most effective ways to shout “hey, look here!” Fortunately there is a tool in Photoshop that makes it easy for you to add custom shapes to your images. Our guide below will show you how to make an arrow in Photoshop CS5 using this tool.
How to Draw an Arrow in Photoshop
Continue reading below for more information on drawing an arrow in Photoshop, including pictures for these steps.
How to Make an Arrow in Photoshop
If you have added arrows to images in the past, then you may have done so either with one of the free-hand drawing tools in Photoshop, or by combining a few straight lines. But there is actually an existing arrow tool in the program, and it makes arrow creation a breeze. So follow the steps outlined below to learn how to add an arrow to your image.
Step 1: Open the image to which you want to add an arrow in Photoshop CS5.
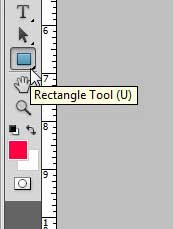
Step 2: Click the Shapes tool in the toolbox at the left side of the window.
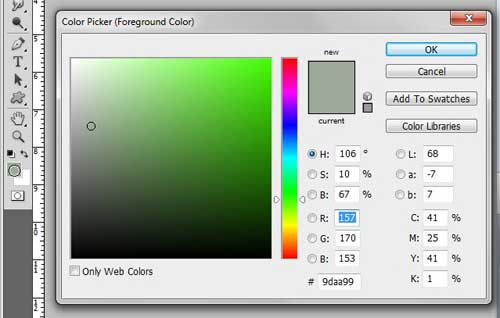
Step 3: Click the Foreground color box at the bottom of the toolbox, then choose the desired color for your arrow.
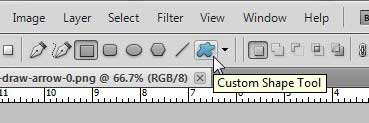
Step 4: Click the Custom Shape Tool at the top of the window.
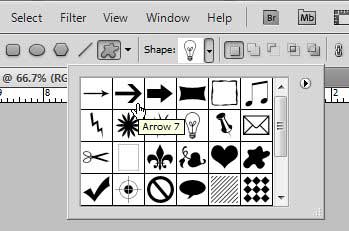
Step 5: Click the drop-down menu to the right of Shape, then choose your desired arrow shape. There are a couple of different options, so select the one that you prefer.
Step 6: Click and hold your mouse, then drag it until the arrow is at the desired size. Don’t worry if it is not facing the correct direction – we will fix that in a second.
Step 7: Press Ctrl + T on your keyboard to select the Transform tool, then rotate your arrow until it is facing the correct direction.
Step 8: Press Enter on your keyboard to accept the change. You will note that the arrow has been added to your image as a separate layer, so you can feel free to edit it by itself without affecting the content of your other layers.
Note that you can also move the position of the arrow by clicking the Move Tool in the toolbox, then dragging the arrow. After receiving his Bachelor’s and Master’s degrees in Computer Science he spent several years working in IT management for small businesses. However, he now works full time writing content online and creating websites. His main writing topics include iPhones, Microsoft Office, Google Apps, Android, and Photoshop, but he has also written about many other tech topics as well. Read his full bio here.
You may opt out at any time. Read our Privacy Policy


