Some Web hosts will install certain plugins along with your site that you may not want, and you may need to install multiple similar plugins to get the exact functionality that you want. Both of these situations can lead to a lot of unused plugins existing on your site. Extra plugins can slow down your site, and can even be a security risk. Therefore it’s a good idea to delete plugins that you aren’t using anymore. Our tutorial below will show you how to delete a plugin in WordPress.
How to Remove a Plugin from Your WordPress Installation
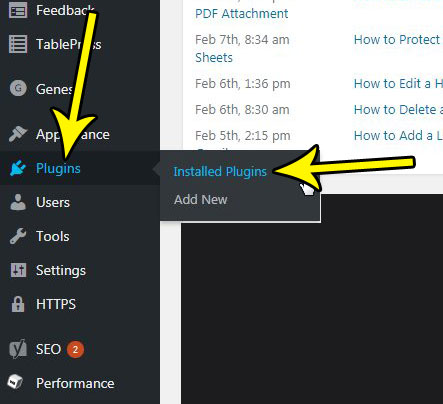
The steps in this article are going to assume that you have a plugin on your WordPress site that you don’t want anymore, and would like to delete. Step 1: Sign into the admin section of your WordPress installation. This is located at yourdomainname/admin-wp Step 2: Hover over the Plugins item in the left column, then choose the Installed Plugins option.
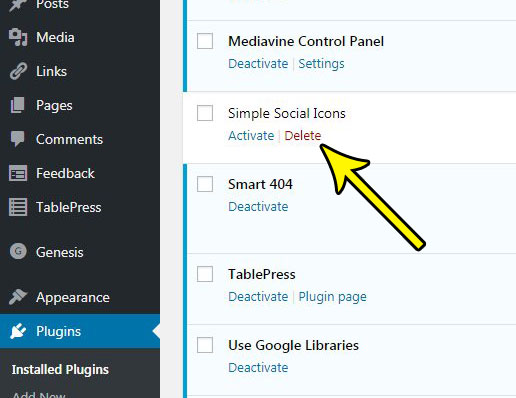
Step 3: Find the plugin that you want to delete from this list, then click the Delete button under that plugin. If you don’t see a Delete option, then the plugin may still be active. In that case you will need to click the Deactivate button first. Note that deactivating certain plugins can have a big impact on your site, so be sure to check your site after deactivating that plugin to ensure that everything is still working properly.
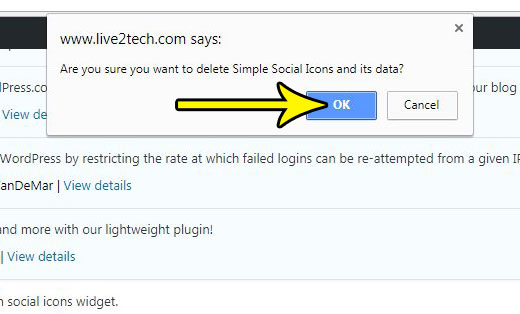
Step 4: Click the OK button to confirm that you wish to delete the plugin and its data.
If you often find yourself staying up late or waking up early so that you can post at a certain time, then post scheduling could be very helpful for you. Find out how to schedule a post in WordPress so that it goes live on a date and time that you choose. He specializes in writing content about iPhones, Android devices, Microsoft Office, and many other popular applications and devices. Read his full bio here.


